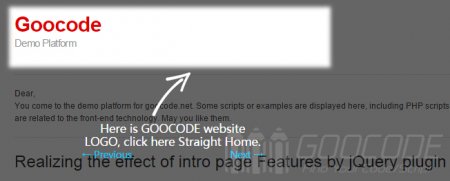
This article will introduce another intro pages based on jQuery plugin: pagewalkthrough.js, see how to use it.
HTML
First, remember that jQuery css files and library files needed to load and pagewalkthrough plugins.
<!-- CSS -->
<link type="text/css" rel="stylesheet" href="css/jquery.pagewalkthrough.css" />

<!-- jQuery -->
<script type="text/javascript" src="jquery.min.js"></script>
<!-- Page walkthrough plugin -->
<script type="text/javascript" src="jquery.pagewalkthrough.min.js"></script>
Next, we add in the lowest part of the contents of the page guide is needed to show the contents of each step, the default first hidden content, such as calls with jQuery.
<div id="walkthrough-content">
    <div id="walkthrough-1">
        <h3>Welcome to the demo page example DEMO by GOOCODE</h3>

        <p>Features page intro effect is realized by pagewalkthrough jQuery plugin.</p>
        <p>Click Next to learn more ...</p>
    </div>

    <div id="walkthrough-2">
        Here is GOOCODE website LOGO, click here Straight Home.
    </div>

    <div id="walkthrough-3">
        Click here to see the demo name of the page.
    </div>

    <div id="walkthrough-4">
        Click here you can go to the tutorials of the demo.
    </div>

    <div id="walkthrough-5">
        This is the footer and copyright information.
    </div>
</div>
Guide content support html content, you can add links, images and other information on the inside. There is a page you want to guide the arrow picture has packed a direct call using css, about fonts, you can call external fonts, such as handwriting might better.
jQuery
You can join at the bottom of the page the following code to call pagewalkthrough, the key steps is an array of options to define the content of each step guide called, the parameter defines the current boot wrapper element corresponding to the location of the parameter definitions popup pop-up prompts guide layer, the parameter definition content content elements associated parameter type definition pop ways, including tooltip and the modal and nohighlight three ways, pop-layer parameter position defines the position, including top, left, right or bottom.
<script>
$(function() {
    // Set up tour
    $('body').pagewalkthrough({
        name: 'introduction',
        steps: [{
           popup: {
               content: '#walkthrough-1',
               type: 'modal'
           }
        }, {
            wrapper: 'div.logo',
            popup: {
                content: '#walkthrough-2',
                type: 'tooltip',
                position: 'bottom'
            }
        }, {
            wrapper: 'h2#toc',
            popup: {
                content: '#walkthrough-3',
                type: 'tooltip',
                position: 'bottom'
            }
        }, {
            wrapper: 'a[href="http://www.goocode.net/js/143-realizing-the-effect-of-intro-page-features-by-jquery-plugin.html"]',
            popup: {
                content: '#walkthrough-4',
                type: 'tooltip',
                position: 'right'
            }
        }, {
            wrapper: 'div.footer',
            popup: {
                content: '#walkthrough-5',
                type: 'tooltip',
                position: 'top'
            }
        }]
    });

    // Show the tour
    $('body').pagewalkthrough('show');
});
</script>
Once saved, you can see what you want to run effect. pagewalkthrough.js official plugin provides many parameters, including setting pop-layer width, scrolling speed, whether to automatically scroll, scroll lock, and a variety of callback function, step on the Next button, as well as the definition of method calls, etc., which this is no longer description, interested friends can move on to the project's official website to learn more: https: //github.com/jwarby/jquery-pagewalkthrough.

