The LNMP environment we often refer to is the Linux/nginx/MySQL/PHP combination. What is LEMP? Actually, Nginx is pronounced Engine-X = E. The LEMP package is made up of Linux, nginx, MariaDB/MySQL, and PHP. It seems that LEMP and LNMP are the same. Now, it is customary to call LEMP in the industry. MariaDB is a branch of the community-driven MySQL database. It has more features and better performance, so we installed MariaDB under CentOS7. I already installed CentOS7. Now I just need to install Nginx, MariaDB and PHP.
1, install Nginx
We install a pre-built stable version of the nginx package from the nginx official RPM source.
$ sudo rpm --import http://nginx.org/keys/nginx_signing.key
$ sudo rpm -ivh http://nginx.org/packages/centos/7/noarch/RPMS/nginx-release-centos-7-0.el7.ngx.noarch.rpm
$ sudo yum install nginx
In this way, nginx is installed and nginx does not start automatically after the installation is complete. What needs to be done now is to let nginx start automatically, and also to configure it so that it can be started as the operating system starts. We also need to open the TCP/80 port in the firewall so that we can access the nginx web service remotely. All these operations and settings need only be entered as follows.
$ sudo systemctl start nginx
$ sudo systemctl enable nginx
$ sudo firewall-cmd --zone=public --add-port=80/tcp --permanent
$ sudo firewall-cmd --reload
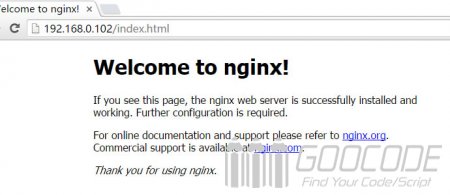
Nginx has been started, and now to test nginx. The default directory for nginx under CentOS 7 is /usr/share/nginx/html. The default index.html file must already be in this directory. Let's check if we can access this test web page and enter http://nginx ip address/access.
2, install MariaDB / MySQL
CentOS/RHEL 7 uses MariaDB instead of the default MySQL. As a simple replacement for MySQL, MariaDB guarantees maximum compatibility with MySQL's API and command line usage. Here is an example of how to install and configure MaraDB/MySQL on CentOS7.
$ sudo yum install mariadb-server
$ sudo systemctl start mariadb
$ sudo systemctl enable mariadb
After successfully starting the MariaDB/MySQL service, you also need to configure the security of the database, such as setting the (non-empty) root password, deleting anonymous users, and locking down remote access. Execute the following code:
$ sudo mysql_secure_installationFollow the prompts to set the root password and delete anonymous users.
3, install PHP
PHP is an important component of the LEMP package. It is responsible for taking the data stored in the MariaDB/MySQL server to generate dynamic content. For LEMP needs, you need to install at least two PHP-FPM and PHP-MySQL modules. PHP-FPM (FastCGI Process Manager) implements the access interface for nginx servers and PHP applications that generate dynamic content. The PHP-MySQL module enables PHP programs to access the MariaDB/MySQL database.
First check the currently installed PHP package.
yum list installed | grep phpIf you have installed PHP packages, delete them first.
Add a source package to the yum installation.
rpm -Uvh https://mirror.webtatic.com/yum/el7/epel-release.rpm
rpm -Uvh https://mirror.webtatic.com/yum/el7/webtatic-release.rpm
Run yum install.
Use the yum command to customize the PHP engine and install some PHP extension module packages.
yum install php56w.x86_64 php56w-cli.x86_64 php56w-common.x86_64 php56w-gd.x86_64 php56w-ldap.x86_64 php56w-mbstring.x86_64 php56w-mcrypt.x86_64 php56w-mysql.x86_64 php56w-pdo.x86_64Then install PHP FPM.
yum install php56w-fpmFinally, start PHP-FPM
$ sudo systemctl start php-fpm
$ sudo systemctl enable php-fpm
4, configure LEMP, let Nginx support PHP
First, disable the httpd service installed with the PHP package.
$ sudo systemctl disable httpdNext, configure the nginx virtual host so that nginx can handle PHP tasks through PHP-FPM. Open /etc/nginx/conf.d/default.conf with a text editor and modify it as follows.
server {
    listen       80;
    server_name  localhost;
	root /usr/share/nginx/html;
    index index.php index.html index.htm;

    #charset koi8-r;
    #access_log  /var/log/nginx/log/host.access.log  main;

    location / {
    }

    #error_page  404              /404.html;

    # redirect server error pages to the static page /50x.html
    #
    error_page   500 502 503 504  /50x.html;
    location = /50x.html {
    }

    # proxy the PHP scripts to Apache listening on 127.0.0.1:80
    #
    #location ~ \.php$ {
    #    proxy_pass   http://127.0.0.1;
    #}

    # pass the PHP scripts to FastCGI server listening on 127.0.0.1:9000
    #
    location ~ \.php$ {
	    try_files $uri =404;
	    fastcgi_pass 127.0.0.1:9000;
	    fastcgi_index index.php;
	    fastcgi_param SCRIPT_FILENAME $document_root$fastcgi_script_name;
	    include fastcgi_params;
    }
}
Then configure PHP and modify /etc/php.ini.
cgi.fix_pathinfo=1
date.timezone = PRC
Finally, test whether nginx can handle PHP pages. Before testing, make sure to restart nginx and PHP-FPM.
$ sudo systemctl restart nginx
$ sudo systemctl restart php-fpm
Create a file named test.php, and write the following content into the /usr/share/nginx/html/ directory.
<?php
phpinfo();
?>
Open your browser and enter http://nginx's IP address/test.php. After seeing the following interface, LEMP installation is complete.


